User Inputs
The user input area is shown in Figure 1. The user inputs the protein-ligand pairs for which binding affinities are to be predicted in one of three different ways (Figure 1, “1”). If selecting the “Fasta” or “PDB ID” radio button options, a single .csv file is to be uploaded via the “Browse” button (Figure 1, “2”). This file should have a column for the ligand SMILES (Figure 1, “3”), and a column for the FASTA sequence or the PDB ID of the protein (Figure 1, “4”), depending on the radio button option chosen. The “Download Sample” option (above and to the right of the “Browse” button) provides an example of the input file. Upon specifying the SMILES and FASTA/PDB ID columns, a preview of the first 5 rows of the columns is provided (Figure 1, “5”) as a quick check for whether the correct columns have been selected. Descriptive tags can be entered for the job (Figure 1, “6”) for easy identification of the job in the jobs list (see below). Note: The user needs to hit “enter” for the job tags to be applied. The job is submitted via the “submit” button (Figure 1, “7”).
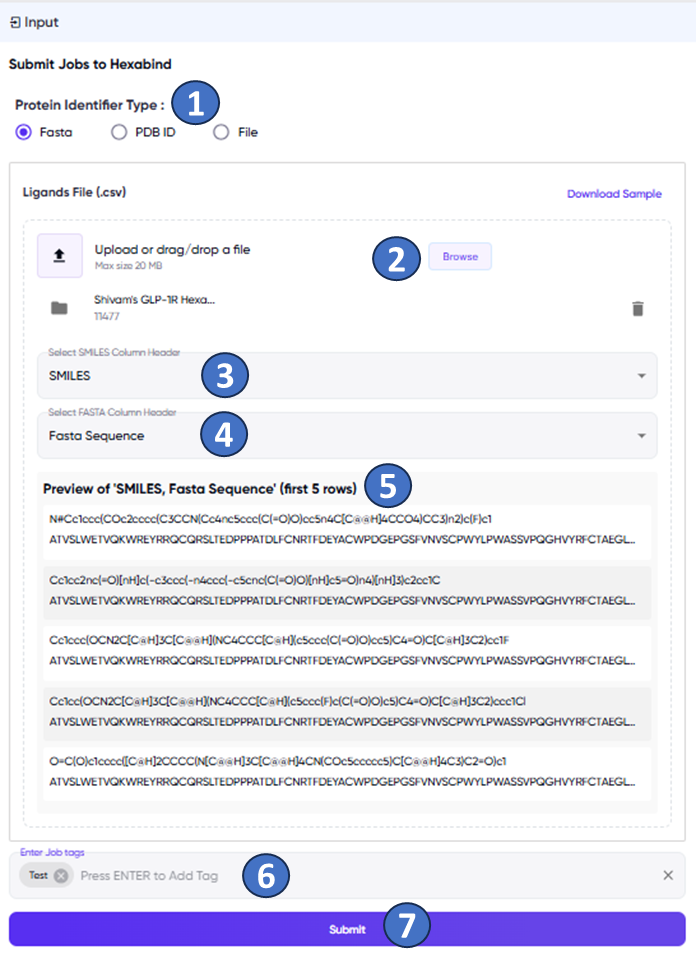
Figure 1: The Hexabind screen with the user input panel. The various fields and functions marked in the figure are described in the text above.
If the user chooses the “File” radio button option, then two files are required to be uploaded. A .csv file containing a column of SMILES (column to be specified as described above), and a .pdb file of the desired protein. Note that the “File” option is suitable when the protein remains the same for all desired protein-ligand pairs, while the other two options allow changing the protein as well as the ligand for each protein-ligand pair.